
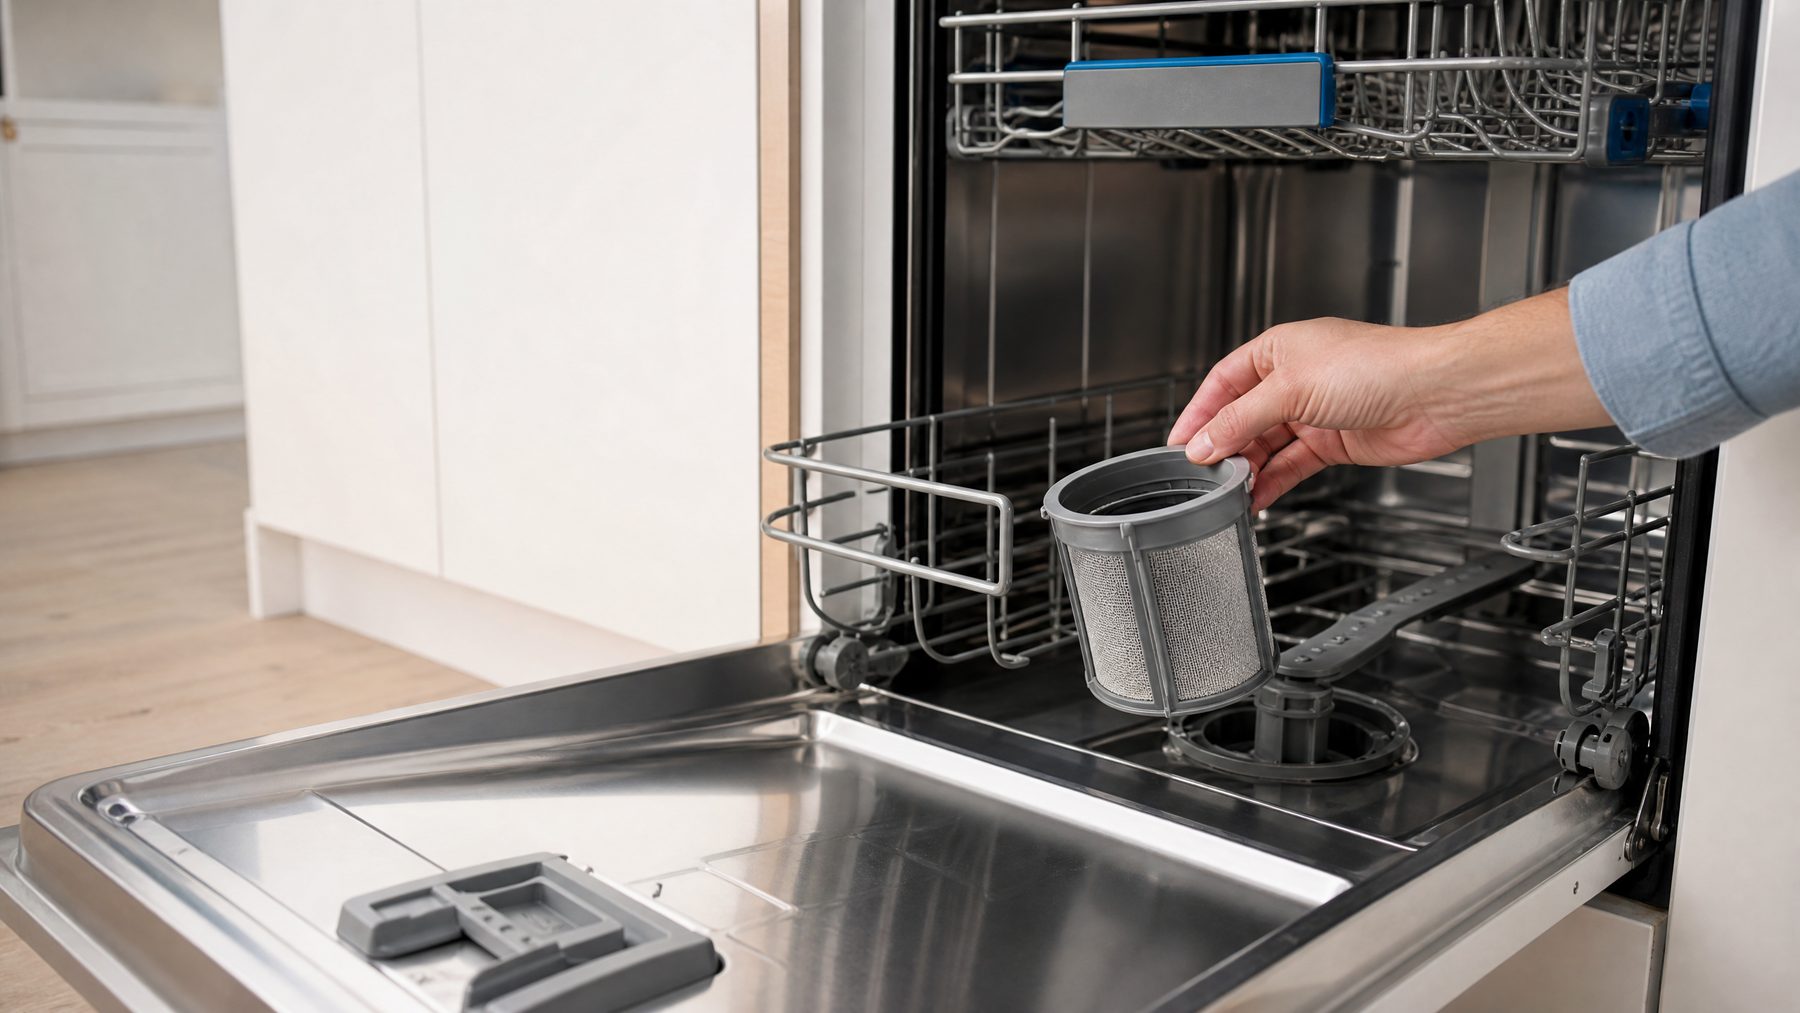
The first time I pulled a dishwasher filter, I found a layer of rice, onion skin, and soft grease sitting under the lower spray arm. I now remove the filter before blaming the detergent or the machine, rinse the screen, check the seal, and put everything back before running a test load. If you also cook under a hood, compare that routine with our guide to range hood filter replacement.
Why I pay attention to the filter The filter’s job is straightforward: trap food and grit so it won’t re-enter wash water or damage the pump. When the filter clogs, you may notice leftover food, slow draining, odd smells, or machine error alerts on some models.
A clean filter lets the wash water reach the spray arms instead of circulating grit. I have fixed cloudy glasses and a sour dishwasher smell more than once simply by clearing the screen and the sump area, then running a short empty cycle. The same food-debris habits matter when cleaning your garbage disposal.
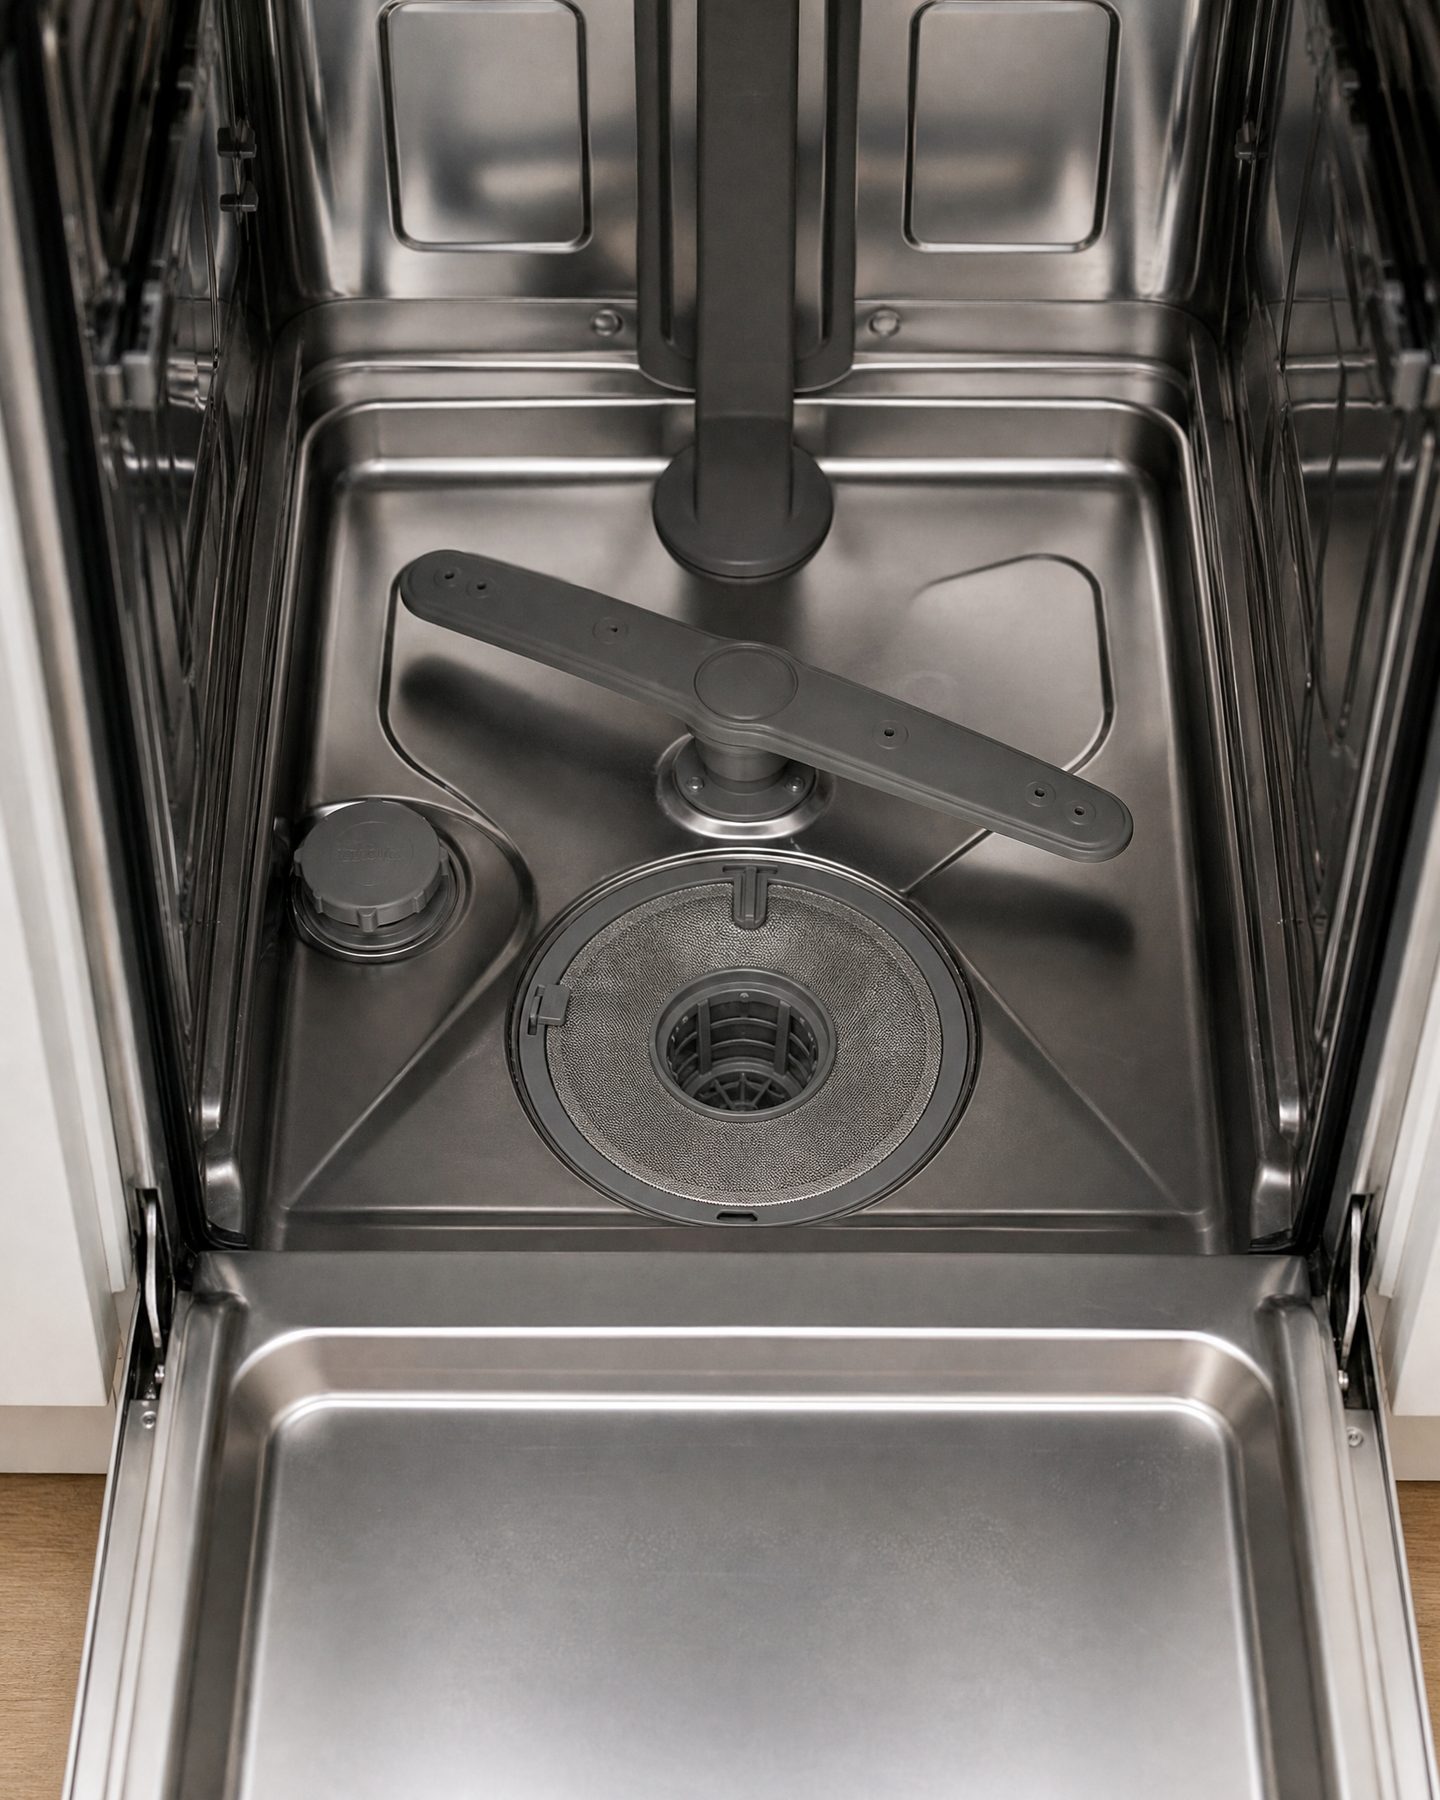
Where the filter lives and how designs differ Most filters sit on the tub floor beneath the lower rack, often near the spray arm or tucked into a corner.
Two common arrangements are a single-piece filter that lifts out as one unit and a two-piece system with an upper fine mesh cylinder and a lower coarse basket. Typical removal is an upper twist-or-release step followed by lifting the lower piece, but the exact layout varies by brand and model [1][2].
Other variations to watch for:
-
Plate-style filters: a flat mesh that lifts out after removing a retaining ring.
-
Self-cleaning or disposable filters: sealed units that may be replaced rather than scrubbed—check your manual first.
-
Recessed filters: covered by a small panel or tab that must be released.
Before you start, slide out the lower rack to get a clear view of the tub floor, spray arm, and any caps, clips, or tabs. Compare what you see to your owner’s manual diagram so you don’t force a part in the wrong direction [1][2].
Tools and materials (short list)
| Item | Why you need it |
|---|---|
| Soft-bristled brush (old toothbrush) | Gently scrubs mesh and tight crevices |
| Mild dish soap | Cuts grease without damaging parts |
| Warm running water | Flushes food and soap away |
| Soft cloth or paper towels | Wipe and inspect seals |
| Rubber gloves (optional) | Keeps hands clean and improves grip |
| Small bowl or towel | Hold small parts while you work |
Safety first:
-
Turn the dishwasher off and make sure the cycle is finished before opening the door. Hot water and steam can burn.
-
If you disconnect power to be extra safe, check the manual for any reset or control-lock settings that may change when power is restored.
-
Never run the dishwasher with the filter loose or unlocked; loose parts can allow debris into the pump and cause damage [2].
-
If you see glass, sharp metal, or broken parts, wear gloves and handle pieces carefully.
Step-by-step: remove, clean, inspect, reinstall
Follow this numbered routine. If your owner manual gives different steps for your model, follow the manual first — manufacturer guidance overrides a general routine [1].
-
Prepare and clear space – Turn the dishwasher off or wait until the cycle ends. Disable any child-lock or control-lock so you can run a test cycle later. – Slide out the lower rack. If the rack has a stop clip, fold or unhook it so the rack comes out fully and you have room to work. – Place a towel beneath the door to catch drips, set a bowl or towel on the counter for parts, and keep a trash can nearby.
-
Identify your filter pieces – Locate the circular cap or rectangular access near the center or rear corner of the tub. – Determine whether you have a two-piece assembly (upper fine mesh plus lower basket) or a single sump filter. Many manuals show this clearly; match what you see to the diagram. – If pieces look stuck, take a quick photo so you have a reference for reassembly.
-
Remove the upper cap or mesh cylinder – Align the cap with any unlock mark and twist counterclockwise about a quarter turn, or press the release tab if present. Lift straight up. – If the cap has a gasket, inspect it now for cracks or hardening. – Place the upper piece in your bowl or on a towel to avoid losing small parts.
-
Lift out the lower basket or filter base – Lift the lower basket straight up and out. Some designs require pressing a tab or sliding a clip first. – If it’s stuck, look for a retention clip rather than forcing removal; forcing plastic tabs can break them. – Tip the assembly over the trash can and gently shake to remove loose debris.
-
Empty loose debris into the trash – Tap the filter over the trash to dislodge loose food and grit. – Use a soft brush or sponge to dislodge stuck pieces. A wooden toothpick can help free trapped grit from mesh holes without enlarging them.
-
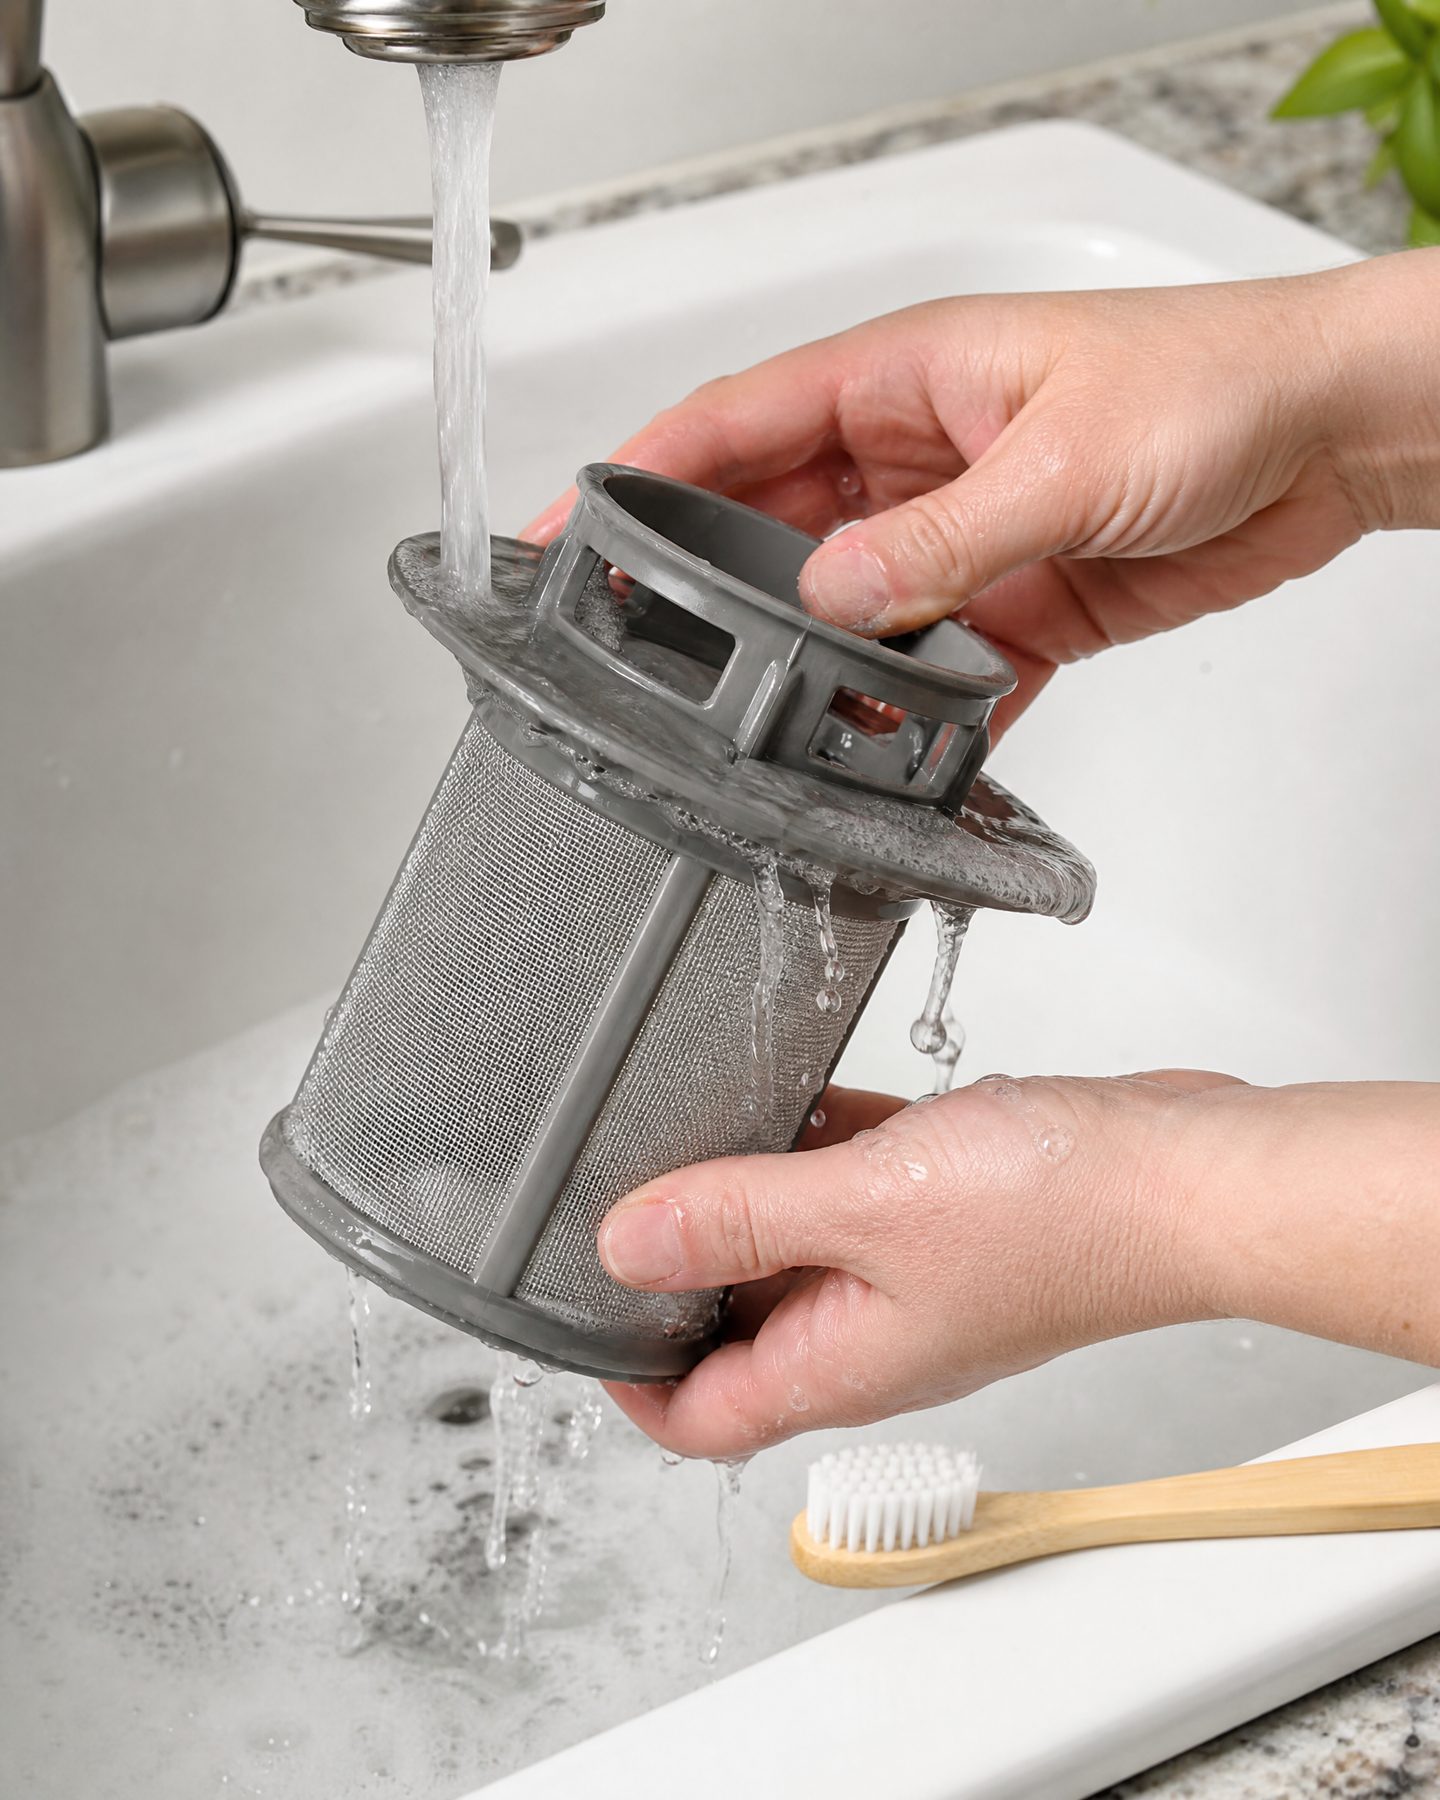
Rinse under warm running water – Rinse both filter parts thoroughly to wash away trapped particles. Use mild dish soap and a soft brush for greasy buildup. – Avoid wire brushes and abrasive pads; they can damage mesh and finishes. – If mineral deposits are present, a short soak in a mild vinegar solution often helps remove limescale; rinse thoroughly afterward.
-
Clear the sump and spray arms – Inspect the open sump cavity beneath the filter and remove any debris by hand or with a towel. Small items and grit can hide around the pump inlet. – Spin the spray arm(s) to confirm they turn freely.
If spray holes are blocked, clear them gently with a soft brush or a toothpick. – Check the pump inlet screen if visible for glass or hard particles; these can cause grinding and must be removed.
-
Inspect seals and gasket – Wipe the rubber gasket or sealing ring and look for tears, flattening, or hardening. If a gasket is compromised, replace it rather than trying to re-seat a warped seal. – Check the filter rim for cracks or missing tabs that let the filter rock loose.
-
Dry and reassemble – Pat parts dry or let them air-dry briefly. – Drop the lower basket into place, line up the upper cap, and twist/lock or clip per the manual. Confirm the cap is locked and does not wiggle. – If your model uses a notch or click, listen and feel for it; a loose filter can allow debris into the pump and damage the machine.
-
Run a short test cycle
- Run a short rinse cycle to check for leaks and confirm that spray arms rotate and water circulates.
- If you hear unusual noises or see error codes, stop the cycle and re-check seating and the sump area.
- Observe the first wash after reassembly to ensure dishes come out clean and there are no leaks.
Why each step matters
Removing and rinsing both parts clears food and grease that trap odors and block water flow. Brushing mesh and checking spray arms restores spray coverage. Inspecting seals prevents leaks. Running a short test lets you catch a loose filter or missed debris before a full load wastes detergent or water.
Practical cleaning tips
-
Use a soft toothbrush for mesh and tight corners — the bristles are gentle and sized for the job.
-
For greasy buildup, soak filter parts in warm soapy water for 15–30 minutes before brushing.
-
For mineral scale from hard water, a light soak in a 1:1 water and white vinegar solution helps dissolve deposits; rinse thoroughly afterward and use this only if your manual doesn’t advise against it.
-
Keep a small container for screws or clips removed so they don’t get misplaced.
-
Prevent heavy build-up by scraping large food scraps into the trash before loading; small prevention reduces filter maintenance frequency.
How often to clean the filter
Frequency depends on loads and how well you scrape. Treat these as starting points:
-
Heavy use with lots of food: check weekly and clean as needed.
-
Typical household use with good scraping: check monthly.
-
Light use and careful scraping: check every 6–8 weeks.
You’ll know a check is due when odors appear, dishes have residue, or draining slows. Manufacturers recommend regular maintenance and to follow the manual for model-specific intervals.
Troubleshooting quick reference
| Symptom | Likely cause | Quick fix |
|---|---|---|
| Dishes still have food residue | Filter clogged or spray arm blocked | Remove and clean filter; clear spray arm holes |
| Foul or sour smell | Food trapped in filter or sump | Clean filter and sump; run a hot cycle with vinegar or dishwasher cleaner |
| Water pooling in bottom | Filter mis-seated or drain clogged | Re-seat filter; check drain hose and garbage disposal connection |
| Loud grinding noise | Debris in pump or impeller | Stop cycle; remove filter and inspect; if noise continues, call service |
| Filter won’t twist/come out | Retention clip or wrong removal direction | Consult manual for correct removal; don’t force |
Quick self-check
This short test helps diagnose likely issues and points toward cleaning or calling a pro. It should take only a few minutes.
| Scenario | What to check/do |
|---|---|
| Dishes cloudy but no visible food | Check spray arm holes and filter mesh for mineral film; run a vinegar rinse and clean filter |
| Dishwasher runs but no water sprays | Confirm filter not clogged; ensure spray arms spin freely; verify water supply to inlet valve |
| Bad odor after a cycle | Remove and clean filter, wipe sump, run a hot rinse with a cup of white vinegar on the top rack |
| Soap residue on dishes | Inspect filter mesh for fatty deposits; clean with warm soapy brush |
| Filter seems loose after reassembly | Reinstall per manual and lock/turn until secure; do not run if it still moves |
How to interpret what you find
-
Thin gray film on mesh: usually mineral or detergent residue. A vinegar rinse followed by soap and gentle brushing clears most of it.
-
Broken glass or metal shards: handle with gloves and remove carefully; check pump inlet screen for damage.
-
Oily, fatty deposits: means food wasn’t scraped well or very greasy pans were washed soon after use. Pre-scrape or use a Heavy cycle occasionally.
-
Sand and grit: common when washing outdoor plates or rice; scraping before loading will reduce accumulation.
When to stop and call for help
Stop and contact a technician if any of these apply:
-
You find cracks, tears, or missing pieces in the filter that prevent a proper seal.
-
You can’t re-seat or lock the filter despite following the manual.
-
After cleaning, the dishwasher leaks from the base or door.
-
Strange sounds (grinding, scraping) continue after clearing visible debris.
-
Error codes persist that reference drainage, pump failure, or filter faults — consult your manual and the manufacturer’s service line.
-
You suspect pump impeller or internal damage.
If you’re not comfortable removing parts beyond the filter (pump cover, motor housing) or identifying components, it’s safer to call a technician. Attempting internal repairs without the right tools can void warranties and cause further damage.
Common mistakes to avoid
-
Don’t force tabs or pry plastic parts with metal tools; they can snap.
-
Don’t use harsh abrasives that enlarge mesh holes or wear finishes.
-
Don’t run the dishwasher with a loose filter — that can allow debris into the pump and damage the unit.
-
Don’t assume filters are identical across models; check your manual before disassembly.
-
Keep small parts contained and labeled so they don’t get lost.
Model differences and following the manual Manufacturers commonly suggest removing any upper cap, lifting the lower basket, rinsing under warm water, and using a soft brush for cleaning.
Bosch emphasizes gentle brushing and careful reassembly, and Whirlpool outlines a simple remove/rinse/replace approach for many designs. Because some models use clips or tabs that differ from the common twist/lift pattern, follow the sequence shown in your owner’s guide to avoid breaking retainers.
If the dishwasher is under warranty, check the manual for maintenance requirements. Some warranties expect routine care records before authorizing repairs for issues that could stem from neglect.
Follow-up checks and maintenance habits
-
Keep a short maintenance log with dates and findings; it helps spot trends and shows a technician what you’ve already tried.
-
Note your filter part number if the manual lists it; gaskets and filters wear over time and are inexpensive compared with major repairs.
-
For hard water, periodically check for mineral buildup and use diluted vinegar soaks only if your manual allows.
-
Photograph assemblies before disassembly if you’re unsure about reassembly order.
-
After replacing a filter or gasket, run a test cycle and recheck for leaks.
Small habits that pay off
A quick filter peek every few weeks takes 3–10 minutes but prevents buildup that reduces cleaning performance. Over time you’ll recognize when parts look normal and when they need attention. Regular light maintenance keeps the dishwasher working smoothly and reduces the chance of odors or repeated service calls.
Final checklist before you call it done
-
Filter sits flush with no gaps and upper piece is locked.
-
Spray arms spin freely and spray holes are clear.
-
No visible debris in the sump or pump inlet.
-
No leaks during a short rinse cycle.
-
Dishes emerge clean on the next full wash.
If everything checks out, you’ve reduced the most common causes of poor dishwasher performance and extended the life of the unit. If problems persist after cleaning and test cycles, use the owner manual troubleshooting steps and the manufacturer’s support resources before attempting deeper repairs.
Quick self-check
| Scenario | What to check/do |
|---|---|
| Dishes cloudy but no visible food | Check spray arm holes and filter mesh for mineral film; clean filter and run a vinegar rinse |
| Dishwasher runs but nothing sprays | Confirm filter clear and spray arms can spin; verify water supply to inlet valve |
| Persistent odor | Remove and clean filter and sump; run a hot rinse with white vinegar |
| Soap residue on dishes | Clean fatty deposits from filter mesh with warm, soapy brush |
| Filter moves after reassembly | Reinstall per manual and ensure it clicks/locks; do not run if still loose |
References
-
Whirlpool, How to Clean a Dishwasher Filter in 3 Steps: https://www.whirlpool.com/blog/kitchen/fixing-removing-and-replacing-dishwasher-filters.html [1]
-
Bosch, How to Properly Clean Your Dishwasher Filter: https://www.bosch-home.com/us/owner-support/get-support/support-selfhelp-dishwashers-cleaning-dishwasher-filter [2]
Leave a Reply