There is nothing more frustrating about vacuuming than a smelly vacuum cleaner. You’re trying to clean your house, but with every sweep you’re getting a slight (or sometimes not subtle) smell of dust, dog, and rot in the air. It’s a frustrating, gross and frankly the telltale sign that your faithful cleaning companion could use some TLC.
But here’s the good news: The craft of deep cleaning a stinky vacuum is not an arcane art. It’s a simple process and can be done on nearly all types of vacuums—canister, upright, bagless, or even a stick vacuum. The stinking problem is almost always a scream from the safe inside calling for help, and we’re going to answer that call. So, let’s get our hands dirty and get rid of that offensive odor for good.
The Golden Rule: Unplug Everything
This may seem obvious, but it is the most important step. Before you handle, poke or prod anything of your vacuum, ensure that it is completely unplugged from the wall. We’re talking about motors, electrical components, and fine dust that can ignite. Safety first, always.
It’s the source for most vacuum odors, especially the bagless kind.
Step 1: The Great Emptying (Or Bag Removal)
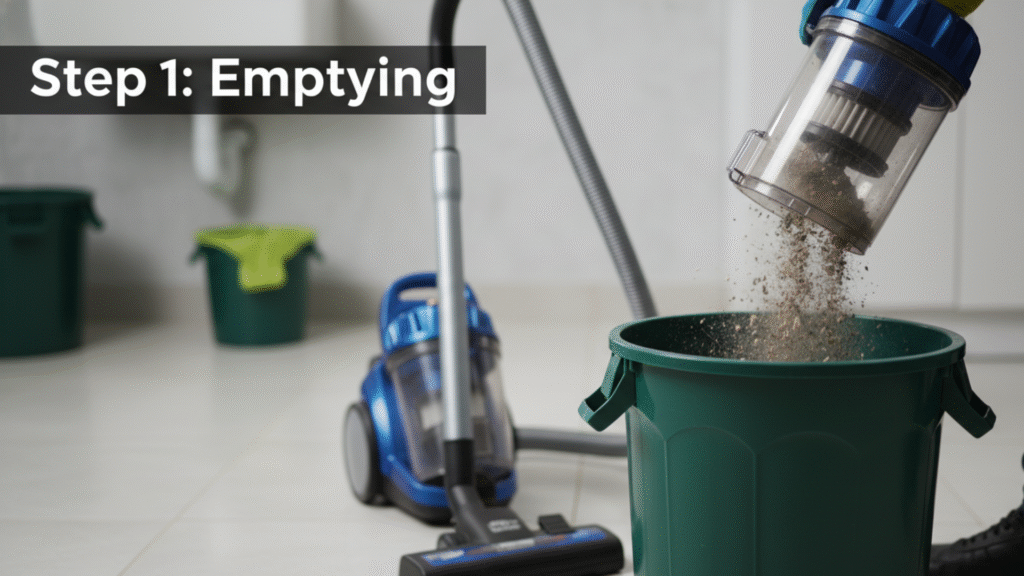
- For Bagless Vacuums: Carry the dust cup to the outdoors or hold it over a wastebasket. Don’t just dump it; tap and shake it to loosen the dust that’s stuck to the sides. That layer of grey, packed-in dust is one of the usual suspects when it comes to odors. We will wash it if cup is very filthy.
- For Bagged Vacuums: Don’t wait for the bag to become overfull. The rule is to swap it out when it is 2/3 full. A full bag restricts the air flow, which in turn makes your vacuum cleaner work hard and cause unpleasant odor.
It can also cause moisture build-up and mold growing in your vacuum cleaner. Just change it, smell or no smell, full or not – definitely if there is a smell. It’s the simplest starting point.
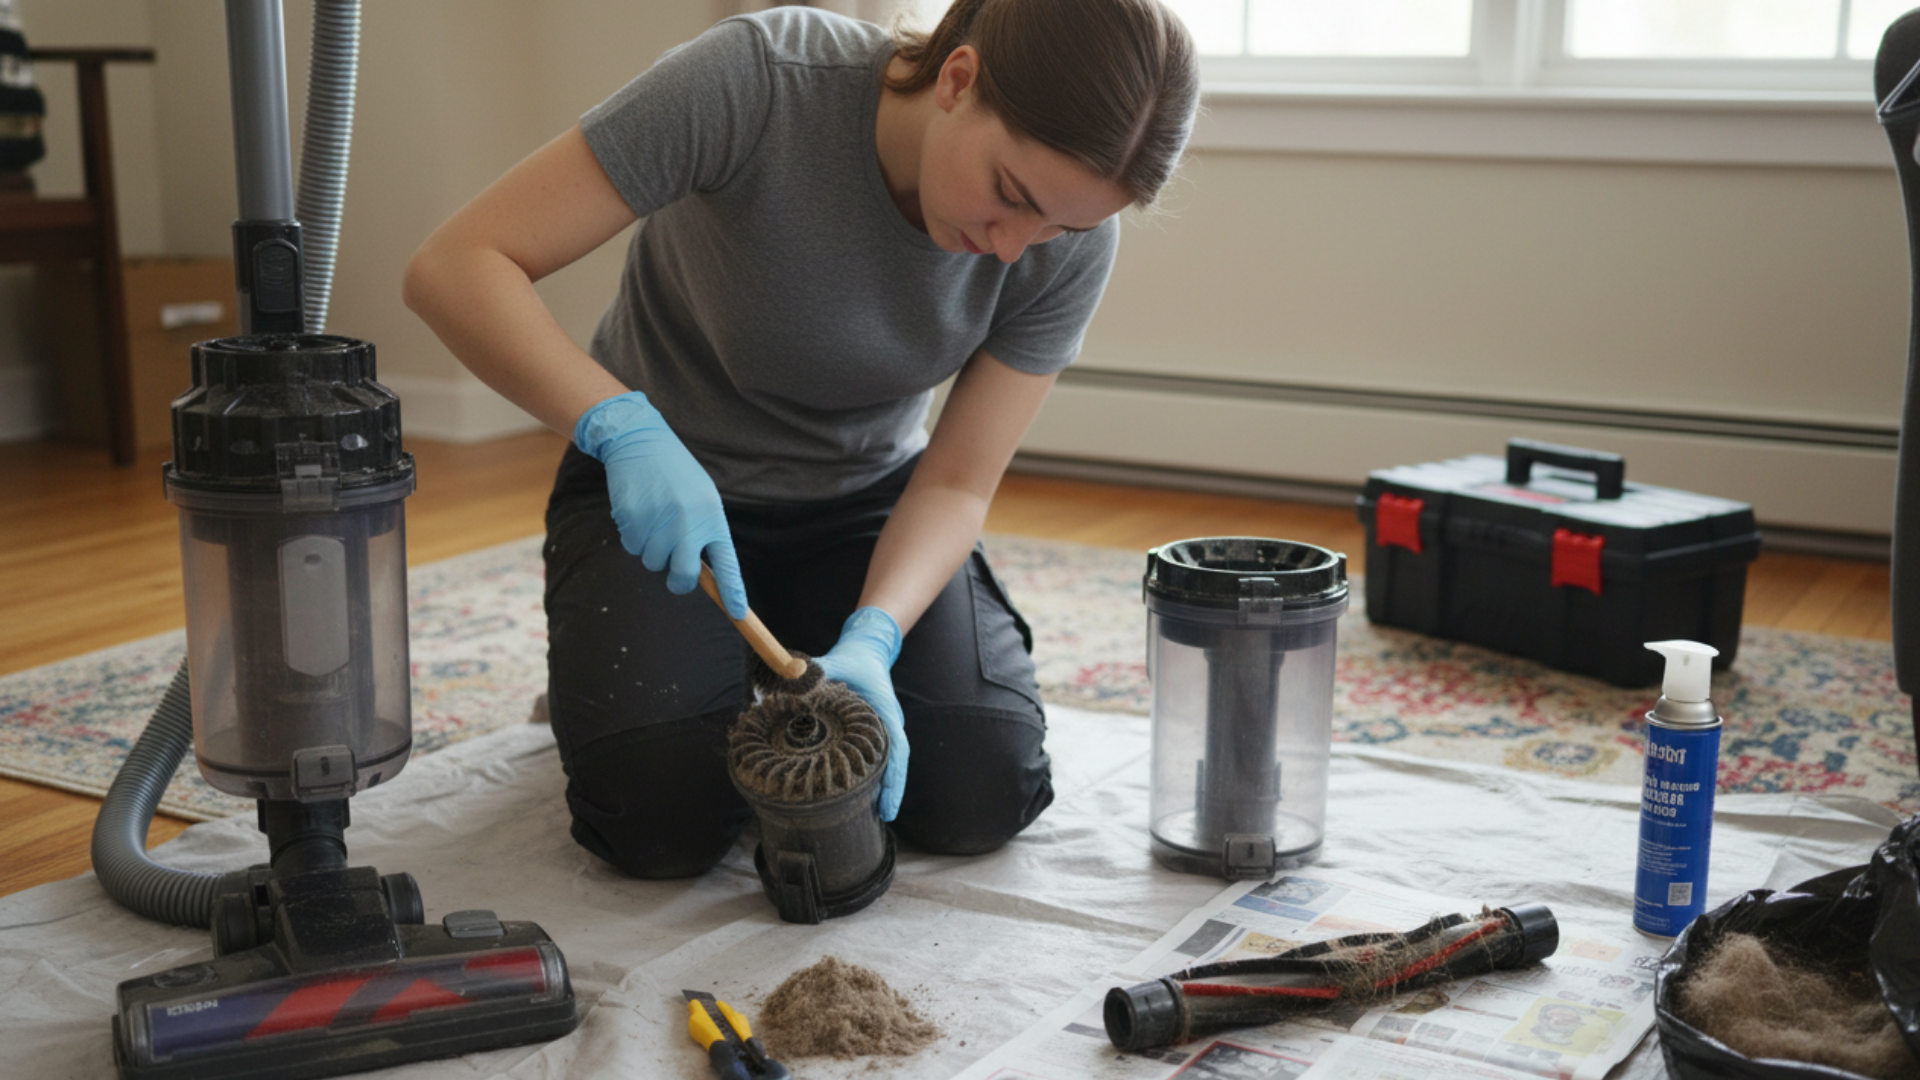
Step 2: The Filter Frenzy – The Heart of the Operation

If the dust cup is ground zero, then the filters are the nuclear epicenter of the dust ball We have been talking about. This is the most crucial step in the process of cleaning a vacuum well enough to get rid of an odor. Most vacuums contain two filters at a minimum, and you must locate and clean them both.
- Locate the filters: Refer to your manual (or a quick web search for your model) to identify all the filters. There’s usually:
- A pre-motor filter that serves as a barrier between the engine and larger debris.
- A post-motor or HEPA filter which further processes the air that is exhausted from the vacuum, capturing micro-allergens like pet dander, dust and more.
- Washability Tested: Can you wash your filters? Washable Foam or Felt Pre-Filters Most vacuum manufacturers now offer washable pre-filters made of either foam or felt that are used in addition to the regular filter in your vacuum.
Your manual will tell you for sure. A brief visual inspection when you’re unsure can’t hurt — if the material is a solid, spongy material, it’s probably washable. If it’s pleated paper or cardboard, it’s not.
- Clean Washable Filters: Take them outside and tap them gently to loosen dust. Then, rinse them with cold water. Do not use soap. Soap can leave a film that clogs the filter. Just run water over them until the water gets clear.
This is the key part: let them air dry completely for at least 24 hours. I’ll say it again: thoroughly dry. Inserting a wet filter back in the vacuum is an excellent way to create mold and mildew, which will lead to a stench a magnitude l worse than what you started with.
- Change the non-washable filters: Paper-based HEPA filters and other similar ones do need to be replaced They normally last 3 to 6 months, but can be changed more often than that if you have furry friends or your household tends to get dusty. These will also make great buys if you vacuum smells. These are not to be washed with water.
Step 3: Treat Your Dust Cup to a Spa Day
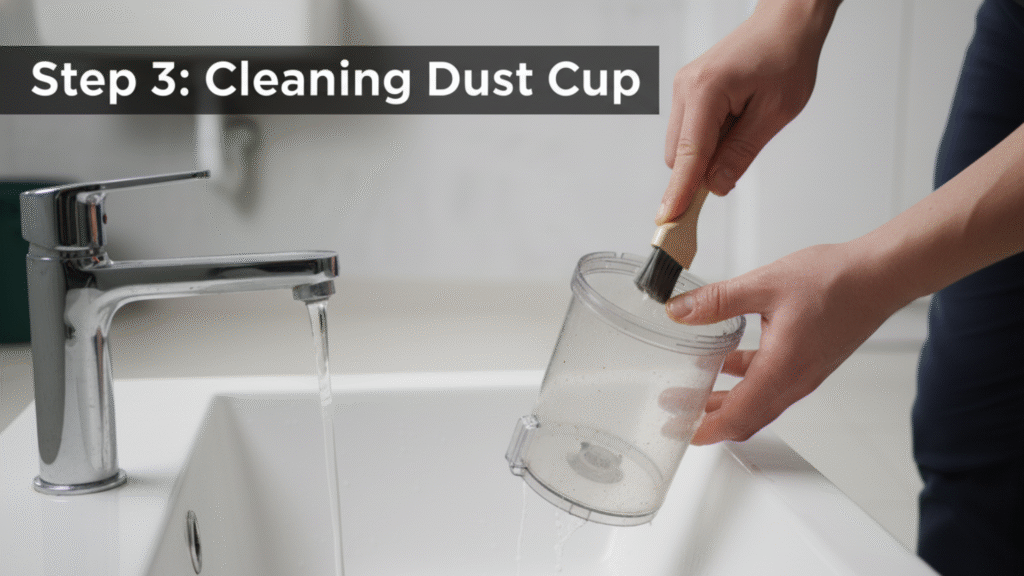
Don’t just empty the bin and call it a day. (It smells.) That’s because that thin film of dust inside is clinging to moisture and bacteria. That thin layer of dust inside is sticking to moisture and bacteria, which makes it smell.
- Take the empty dust cup to the sink.
- Wash it with warm soapy water. A bottle brush or a long-handled dish brush will reach all the nooks and crannies.
- Rinse thoroughly and just like the filters let it air dry completely before reassembling. It might be waiting from the lint you will get from toweling it off.
Step 4: Check the Brush Roll and Pathway
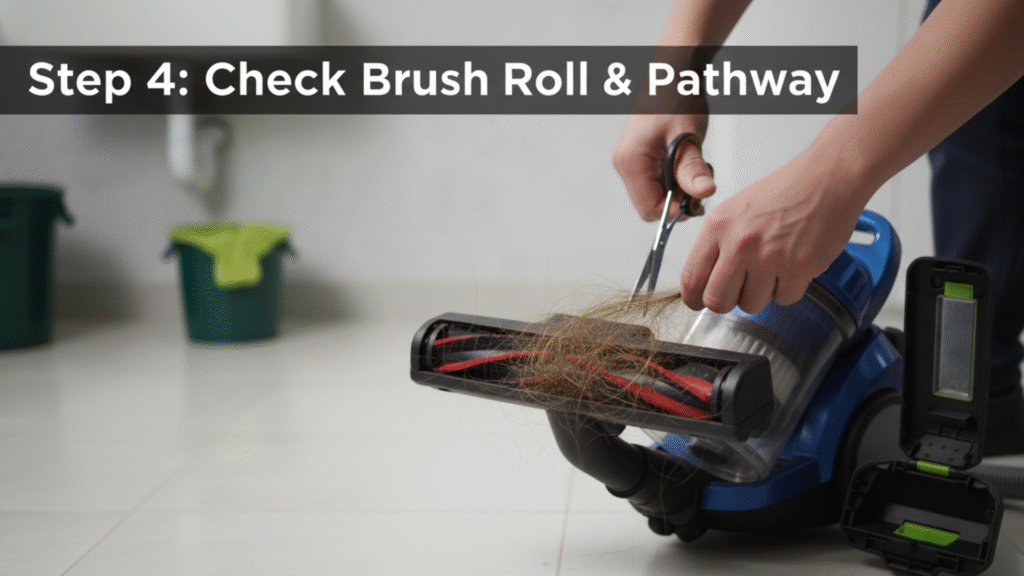
- Check the Brush Roll: Most upright and canister vacuums have a way to remove the brush roll (usually by flipping the vacuum over and removing a few clips/screws). Gently slice off any wrapped-up hair, string or carpet fibrous including staple rapped around blade. These not only slow the brush roll on its wheels; they hold organic material that breaks down and stinks.
- Wipe Down the Air Pathway: Remove the brush roll and peek inside the chamber where the dirt is sucked in. Widen it with a lengthened damp cloth or a small duster to clean off any dust bunnies or dirt stuck along your inside tubes. It’s this road from floor to bin that is a frequent something that stinks and is overlooked!
Now let’s turn to the business end of the vacuum — the part that actually agitates your carpet and moves the dirt up.
Step 5: The Final Touch – A Natural Deodorizer
When all is clean, dry, and back together, you can give your vacuum a final freshening. This is a nice trick to air out vacuum odors with a natural ingredient.
- Take a little baking soda—maybe a tablespoon or two.
- Dust it straight down on your carpet.
- Pass your vacuum on it.
The baking soda will be sucked up into the now-clean system, neutralizing any remaining microscopic odors inside the canister and filters. It is a mild, efficient and non-toxic way to make your vacuum smell clean.
There are those who recommend essential oils, but I would not because, eventually, they leave a sticky residue on the internal components.
Prevention: How to Keep Your Vacuum Cleaner and Smelling Fresh
A deep clean is great, but preventing the smell from returning is even better. It’s really integrating this as a routine that’s the secret to a smelling-fresh vacuum.
- Empty the Canister More Often Than You Think: Don’t wait until it’s full. Make a habit of emptying it after every cleaning or two, particularly if you’re picking up pet hair, or fine dust.
- Follow a Filter Maintenance Routine: Set a reminder. Run washable filters under water once a month, and replace HEPA filters as recommended by the manufacture. Your vacuum suction and nose will thank you.
- Watch What You Vacuum: Don’t vacuum large wet masses of dirt or ash from the fireplace, or anything moist. If you do have a wet spill, get a specialized wet/dry vac or clean it up by hand first.
- Store It Right: Don’t cram your vacuum cleaner into a tight, damp closet with its dust cup still full. Empty it, and then let it sit for a while to air out before you put it away.
Your Fresh-Smelling Vacuum Is Ready and Waiting
A stinky vacuum cleaner does not indicate that it is time for a new machine, it indicates that you are vacuuming hard and the vacuum just needs a little TLC. By learning how to clean a smelly vacuum deeply, you’re not just getting rid of a foul odor — you’re also boosting your vacuum’s suction and efficiency, and, in the end, making for a truly cleaner home.
The entire process may take you thirty minutes, plus however long the drying takes, but it is well worth it. The next time you switch it on, the first thing you’ll hear is powerful suction and, best of all, it won’t smell like anything.
Leave a Reply