
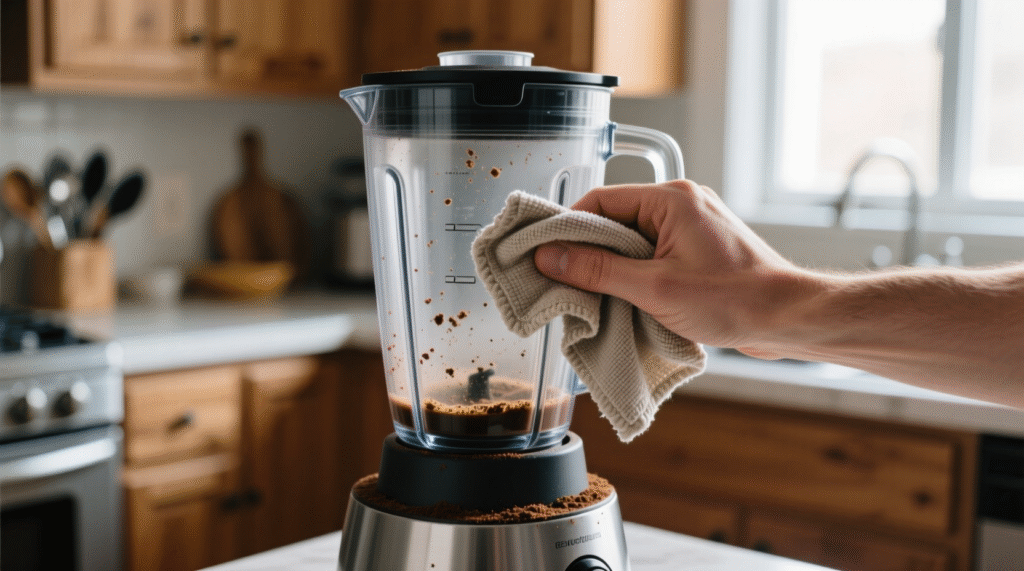
Let’s face it – blenders make great kitchen gadgets, and are living the good life until it’s time to clean them. That caked-on smoothie gunk lodged in the blade assembly, the faint whiff of yesterday’s garlic sauce, or those tenacious seeds stuck in every nook and cranny can make cleaning your blender a task you’re likely to put off. But here’s the bright side: you don’t have to dread cleaning your blender.
You can have your blender looking as good as new in a few minutes using a few tricks, without taking every single piece apart and without risking lacerations from those blades. Whether you just made a protein shake or whipped up some pesto, I’ll show you a few easy tricks that really work.
The Self-Cleaning Method: Your Best Friend
This is hands down the simplest method! It works for roughly 90% of all the blending that I do. The best part about this trick: your blender cleans itself with the very energy that pulverized the ingredients.
So, what do you do: as soon as you have finished emptying your blender, half-fill the jar with warm water. Add a drop or two of dish detergent — you really don’t need much. Replace the lid, return the blender jar to the base, and blend on high for 30 to 60 seconds.
The spinning blades of a blender form a soapy vortex that scrub all the surfaces inside the jar, even those hard-to-reach nooks and crannies near the blade assembly. When you’re done just rinse everything with clean water and that’s it. This method is especially good for smoothies and protein shakes, as well as any other liquid-based recipes.
Pro tip: use warm, not hot water particularly if you’re using a plastic blender jar. Hot water can sometimes warp plastic or cause it to become cloudy over time. Warm water is just as good at breaking down grease and grime without being harmful to the environment.
Cleaning Tough Stains and Odors
The self-cleaning process usually does the trick. After blending turmeric-heavy curry sauces, beet smoothies, or pungent garlic concoctions for days on end, you might find stains or odors that won’t disappear even after washing. Nothing to fear—there’s a quick fix.
Baking soda is your secret weapon here. This mild abrasive is great for lifting stains without damaging your blender jar. Add a little warm water to fill your blender about a third of the way, then put in two tablespoons of baking soda and blend on high for about a minute.
The sodium bicarbonate has the double power of lifting stains and odors. For really persistent stains, make a paste of baking soda with a little water and rub the stained areas with a soft sponge. This is particularly effective on plastic blenders, which tend to retain colors more than the glass ones.
Vinegar is also a great choice for eliminating odors. Place equal amounts of water and white vinegar into the blender to fill it halfway, allow it to sit a few hours (or overnight for really stubborn smells), blend on high then rinse well. The acidity in the vinegar eradicates odor molecules which in turn eliminates the smell from the blender.
Thorough Cleaning of the Blade Assembly
The jar assembly is where the problems arise — and where most folks give up on maintaining their blender. Those blades are sharp, the gasket can trap food particles, and the whole thing seems engineered to hide gunk in places you can’t see.
If the blade assembly on your blender is detachable (check your manual if you don’t know), take it apart once every few weeks for a good cleaning. Unscrew the base of the jar, from the bottom, remove the gasket and wash them all in warm soapy water individually.
Be sure and clean the gasket (that rubber or silicone ring that forms a seal). This is a classic place for mold and other nasties to hide, particularly if you don’t let it dry fully between uses.” Rinse it on its own, look for any residue in the grooves and make certain it is fully dry before putting it back together.
If your blade assembly doesn’t separate, clean around and under the blades with a long-handled dish brush. An old toothbrush is a great tool for cleaning nooks and crannies and loosening up food particles. Just be very careful not to slice yourself with those razor-sharp edges.
Dealing with Cloudiness on Plastic Blenders

If your plastic blender jar is getting cloudy or scratched, rest assured, you’re not the only one. Plastic naturally gets cloudy over time, especially when in contact with acidic foods, minerals from hard water, or abrasive scrubbing.
To clean and brighten your blender jar, do this: Pour in some warm water, add a half cup of white vinegar and then run the blender. Allow to soak for a few hours, or overnight. The acid in the vinegar dissolves mineral deposits that create the cloudiness in glassware. Then wash as usual and dry thoroughly.
You can also use lemon juice for the same effect, and a much nicer scent. Cut a lemon in half, squeeze the juice in your blender along with a little warm water, then toss in the halves and blend for 30 seconds. The citric acid levels in it help to clean and brighten the plastic container, and the residual oils from lemon peel work as a mild abrasive for scrubbing off grime.
The Significance of Timing
Here’s a truth that makes all the difference: the sooner you clean what you’ve been blending, the easier it will be to clean. Dried residue washes away more easily, but waiting can make a dried-on smoothie or petrified nut butter into one hard piece. If you’re not going to clean your blender right away, at least give it a rinse, fill it with water.
This stops ingredients from drying on to the surface, and helps your real cleaning job be easier later. Even just 30 seconds of rinsing right after you’re done can save you minutes of scrubbing later, so it’s worth it.
Think of it this way: you wouldn’t allow scrambled eggs to sit in a pan for hours before washing, would you? The same goes for your blender.
Cleaning the Base and Exterior
Be sure not to overlook the outside of the blender and the base unit. The motor housing may become splattered, dusty or sticky with fingerprints through use.
For the base, unplug your blender (safety first). Clean it with a moistened rag and a little all-purpose cleaner or a water-vinegar solution. Don’t put the base in the water — be aware there are electrical parts in there.
Note the area where the jar rests on the base. Food and liquid particles can drip into the space and buildup. You can clean this area with a moist rag or paper towel regularly, and use a cotton bud for sides or buttons.
The exterior of your blender jar also needs some love. Using a soapy cloth, wipe the outside, including the handle and lid. The lid in particular can harbor bacteria if small pieces of food become lodged in its gasket or pouring spout.
Preventing Problems Before They Start
Prevention is one of the easiest ways to keep your blender clean. Here’s a few maintenance-friendly habits:
- Begin with softer ingredients at the bottom when filling your blender. This tips the food back towards better blending and keeps us from having to stop and stir.
- Don’t overfill your blender. A little head space at the top will help prevent leaks, and will make it harder for food to get caught under the seal on the lid.
- Allow hot liquids to cool a bit before blending. Besides, safety concerns of pressure buildup, cooler liquids are more friendly for the components of your blender and less likely to make it warp or damage the seal.
Parts to Replace
A good care doesn’t guarantee all blender parts will last. Gaskets deteriorate, they become brittle or they lose their seal. If it leaks while you’re blending, you need a new gasket.
Furthermore, blades become dull and can develop nicks from prolonged use, especially if you frequently blend tough things such as ice or frozen fruit. While you can’t sharpen blender blades (and aren’t advised to try), you can buy replacement blade assemblies from most manufacturers.
Look for replacement parts that are designed specifically for your model in your blender’s instruction manual, or on the manufacturer’s website. It’s far cheaper to do this than get a whole new blender.
Make It a Habit
The secret to easily cleaning your blender is to make it part of your routine instead of thinking of it as a special chore. Clean your blender right after each use, give it a more thorough cleaning once a week if you use it daily, and disassemble the blade unit to wash it thoroughly every month or so.
That’s the standard you’re going to set from now on, which means it will never be the crusty, stained, smelly blender you have to dig yourself out of. Your blender will perform better, last longer, and always be waiting for your next culinary masterpiece, whether it’s a morning smoothie, an afternoon soup, or an evening cocktail.
Leave a Reply